Guide for owners
Ready in 15 minutes
The home page shows you a checklist. Once it is ticked off, you are all set.
Step 1
Set up your business
- After logging in, the home page shows you a checklist.
- Add your restaurant under Locations.
- In Settings, check federal state, holidays and limits.
- For extra security: at each location, once stand there with your phone and tap Save location (under Edit).
Step 2
Add employees
- Menu → Employees → Add employee. Enter name, employment type and language.
- Set up access: Stempl creates a password. Give it to the employee together with their email address.
- With Teams such as kitchen and service you see each area separately.

Step 3
Write the schedule
- Menu → Schedule → Plan shifts.
- Choose a shift type, for example early. Then tap the days and employees.
- Next week? Copy last week copies everything with one click.
- Finally Publish week. Only then does your team see the schedule.
Tip: only you see drafts. Your team gets the schedule after you publish it.

Step 4
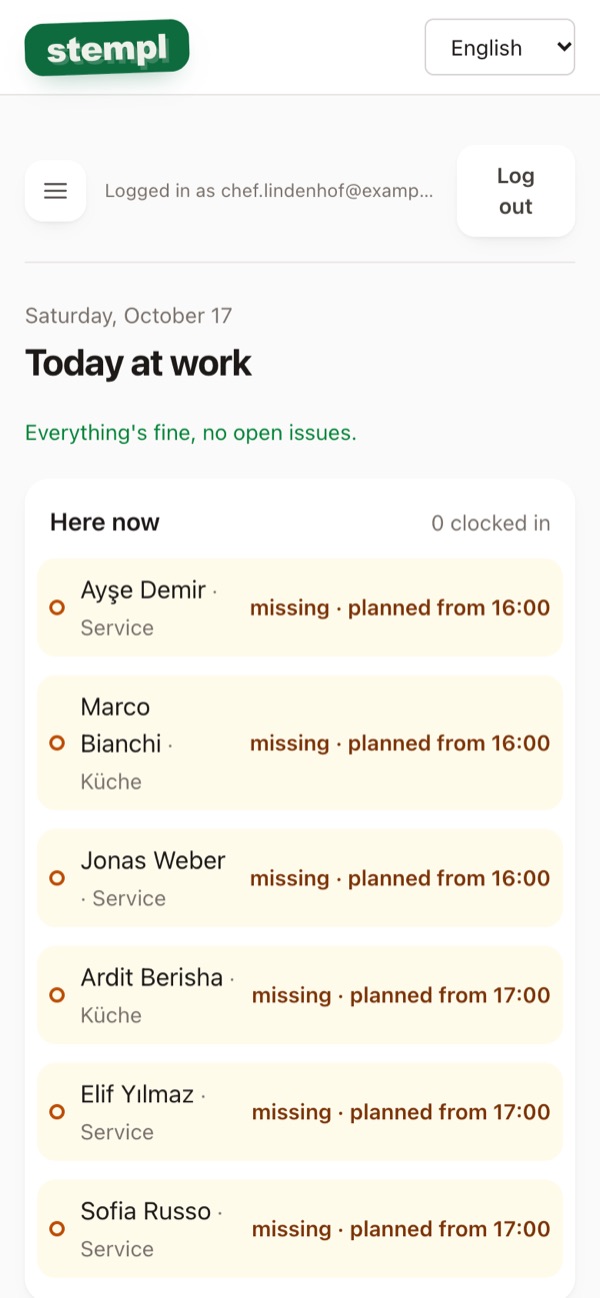
Every day: today at work
- The home page shows who is Here now and who is still missing.
- Tap the yellow notices at the top and sort them out, for example a forgotten clock-out.
- Under Later today you see who is still coming.
Step 5
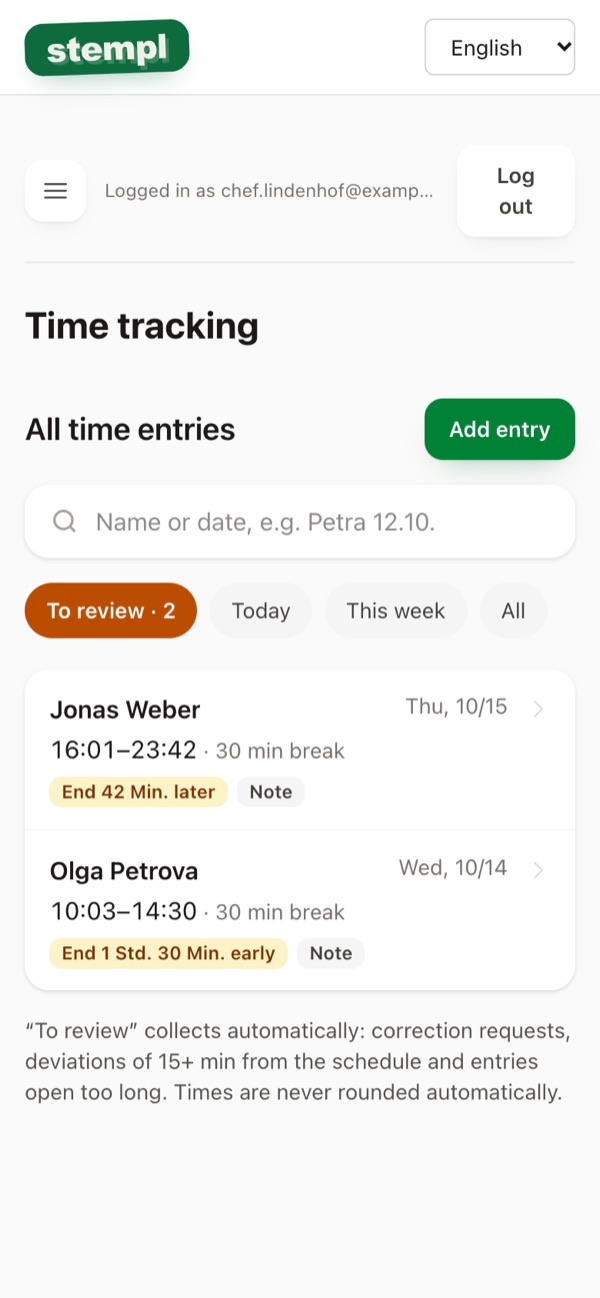
Review times
- Menu → Time tracking. Under To review you find deviations from the plan and correction requests.
- Open an entry: Accept, Fine, reviewed or correct it yourself.
- Every change needs a reason and is kept in the history, for customs and your tax advisor.
Step 6
Approve leave
- Your employees’ requests arrive under Vacation.
- One tap on Approve or Reject.
- You enter sick days yourself.

Step 7
Month end
- Menu → Monthly overview: target, actual and overtime per employee.
- Download CSV for everyone, a PDF per employee or the DATEV file for your tax advisor.
- You set up DATEV once under Settings → DATEV.

Step 8
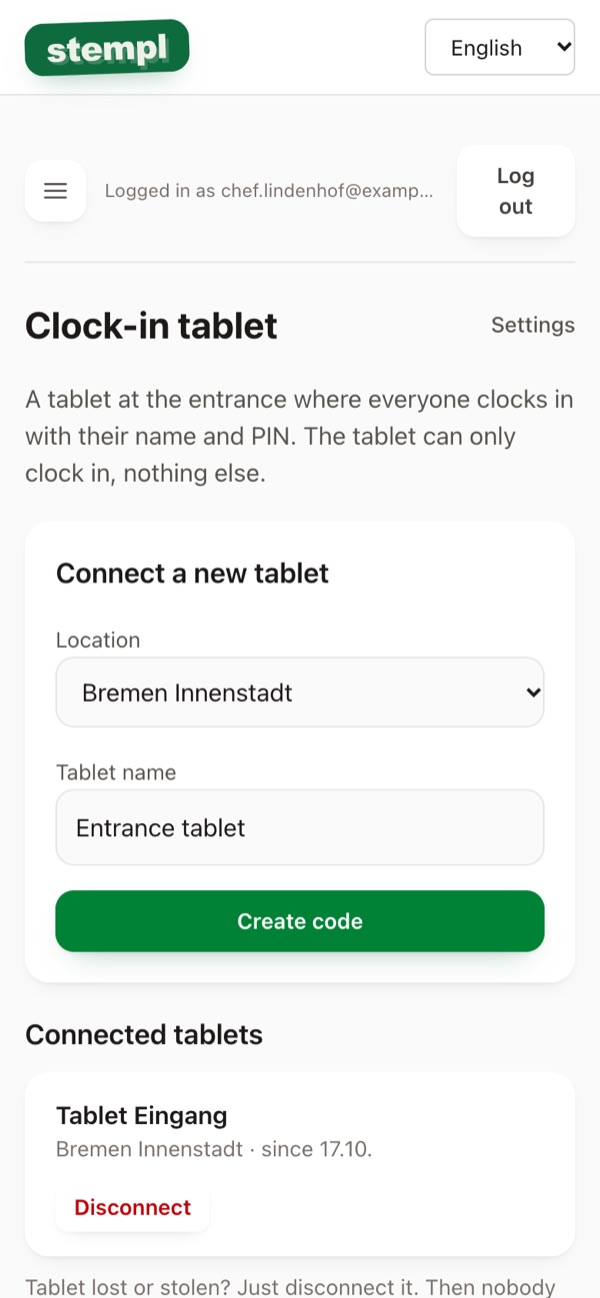
Clock-in tablet
- For employees without a phone: Settings → Clock-in tablet → Create code.
- Give every employee a PIN under Employees → Edit.
- All steps are in the tablet guide.
Settings
Everything under Settings. Set it up once, then you rarely need to come back.
Public holidays
- Settings → Public holidays: choose your Federal state (Bundesland). Then Stempl knows all public holidays.
- Decide whether your business is open or closed on public holidays. If closed, a holiday does not count as a day of leave.
- Holidays are marked in colour in the schedule and the leave calendar.

Limits and warnings
- Limits: the minijob limit and minimum wage are already set correctly.
- Stempl warns on the home page when a minijobber goes over the limit or a wage is below the minimum wage.
- If the values change at the turn of the year, enter them here.
- New: Radius for phone clock-in, how far from the location you can still clock in before it gets flagged for review.
For the warnings to work, every employee needs an hourly wage.

Switch extras on and off
- Under Planning extras you switch Teams, Shift types and Surcharges on or off.
- Whatever is switched off disappears everywhere in the app. That keeps it simple.
- You can switch it back on at any time, nothing is lost.

Surcharges
- Surcharges: switch on night, Saturday, Sunday and holiday one by one.
- The rates are preset according to § 3b EStG. Time windows like the night can be adjusted.
- Stempl calculates surcharge hours to the minute. They appear in the monthly overview, the CSV, the PDF and the DATEV file.
Stempl only counts hours. Your tax advisor calculates the amount in euros.

Set up DATEV
- DATEV export: choose the program (LODAS or Lohn und Gehalt), plus consultant and client number.
- You get the wage types from your tax advisor. The page has a ready-made email for that.
- Every employee needs a personnel number. Enter it under Employees when editing.

Data retention
- Data retention: time records are kept for 2 years, as § 17 MiLoG requires.
- If your tax advisor recommends it, choose 6 or 10 years.
- After that Stempl deletes older data automatically.

Plan and invoices
- Billing: choose a plan, yearly or monthly. With yearly billing you get 2 months free.
- Invoices and payment method are here too.
- You can cancel at any time to the end of the paid period. Afterwards you have 30 days to download your data.

More features
For everyday work: teams, wages, overtime and what happens when someone leaves.
Team leaders
- Employees → open employee → tick Team lead.
- A team leader plans shifts, reviews times and approves leave, but only for their own team.
- Only the owner sees wages, team leaders do not.
Wage, hours, leave entitlement
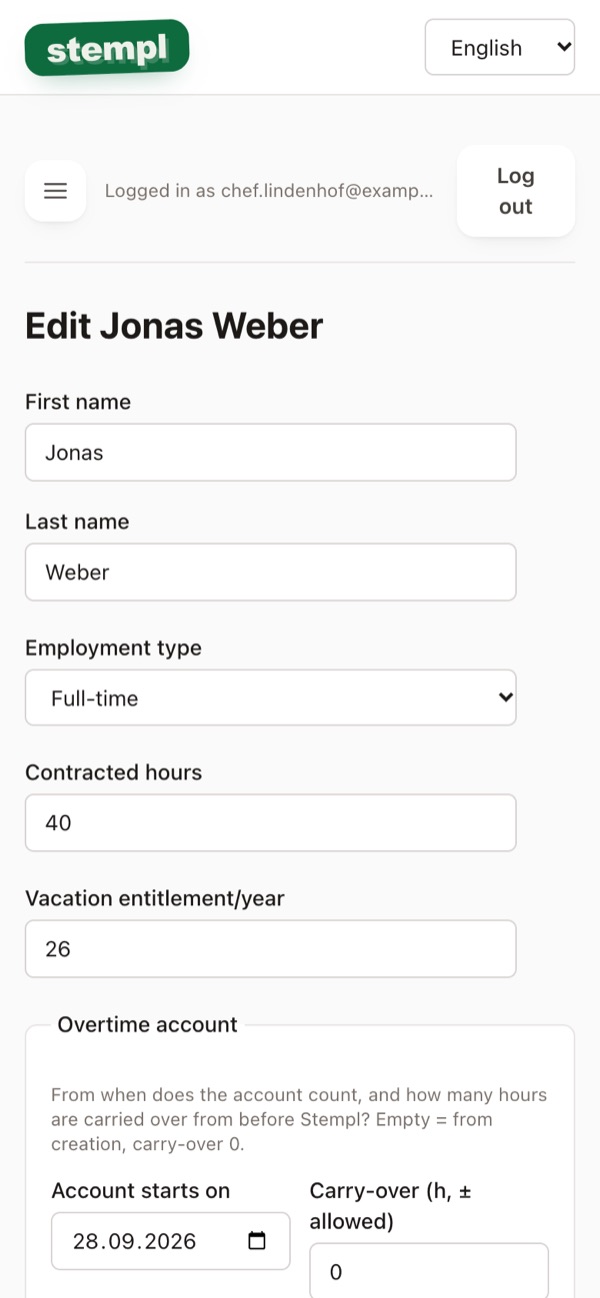
- When editing an employee: Hourly wage, Contracted hours and leave entitlement.
- A new hourly wage applies from a date. Earlier months keep the old wage.
- The Employees list shows everything at a glance.
Shift types, teams, split shifts
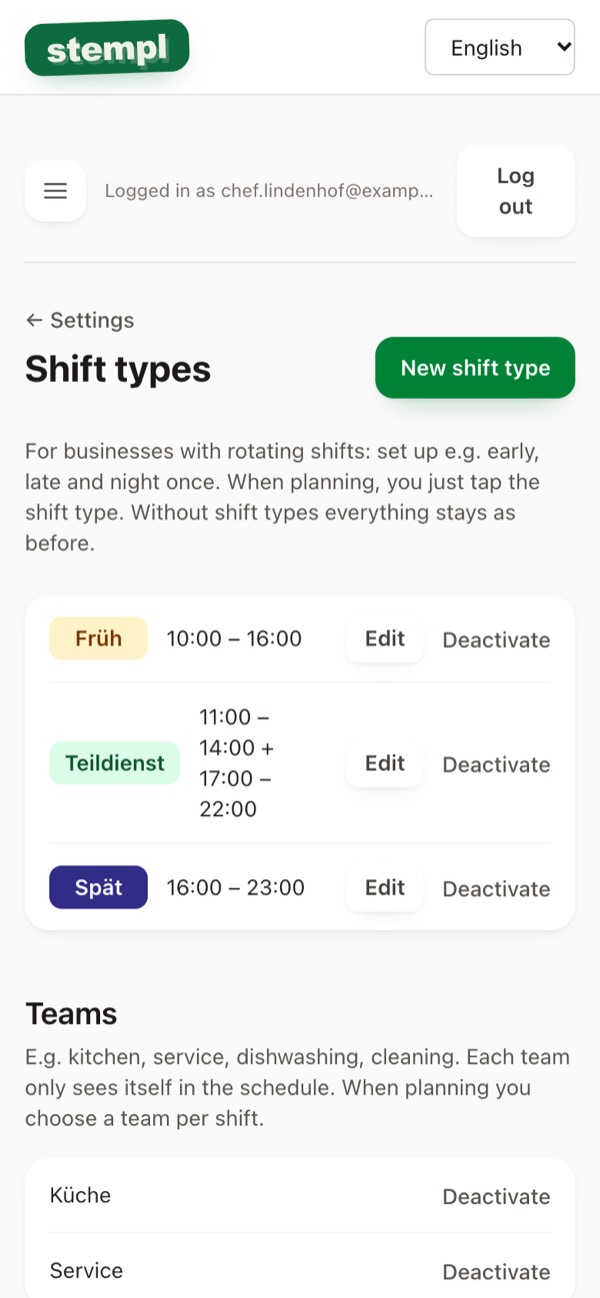
- Shift types & teams: create your own shifts like early or late with times.
- A Split shift has two blocks, for example 11 to 14 and 17 to 22. The gap is free time.
- You create teams like kitchen and service on the same page.
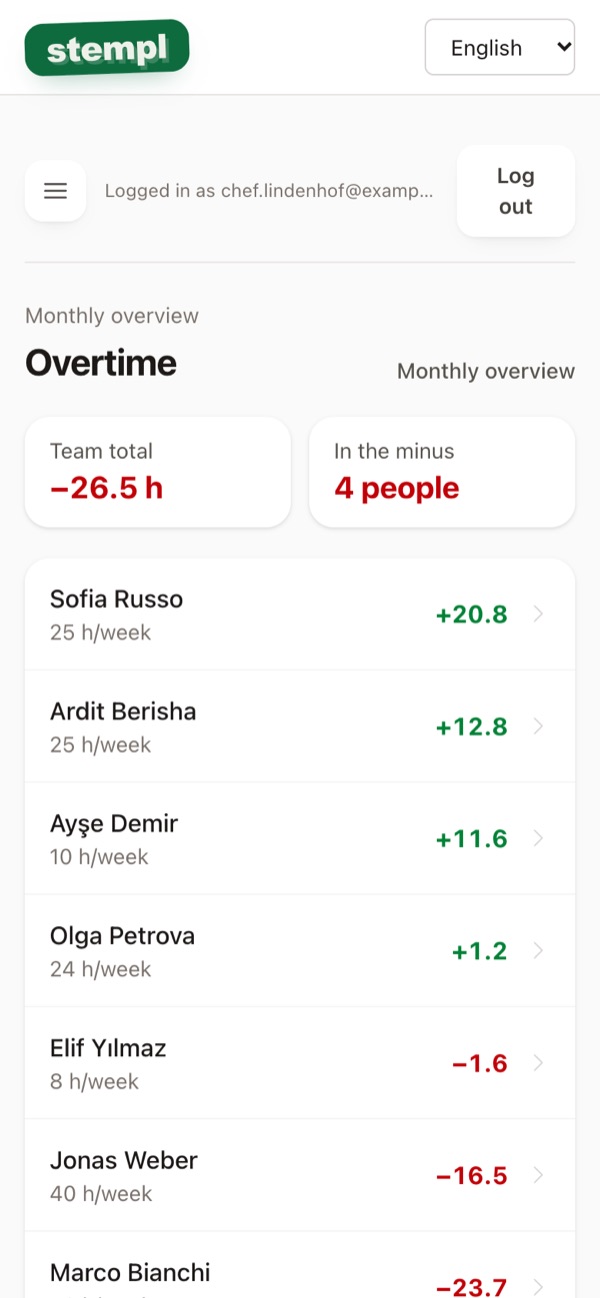
Overtime account
- Monthly overview → Overtime account: plus and minus for every employee.
- Leave, sickness and public holidays are counted correctly.
- Set the start date and carry-over for each employee under Edit.
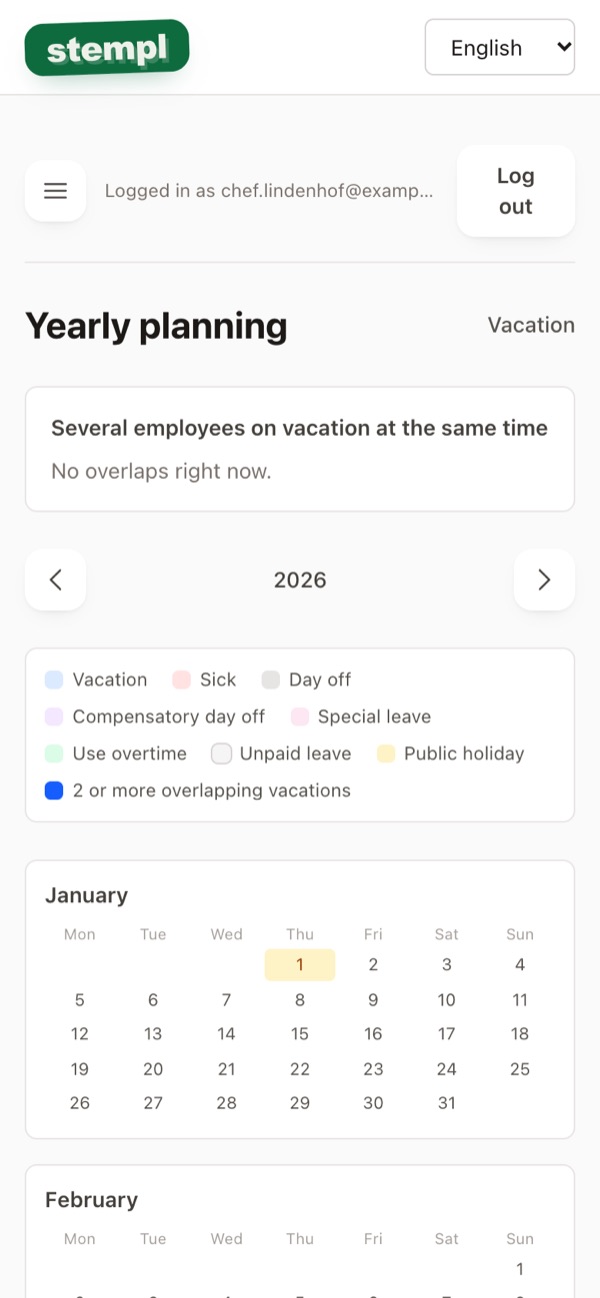
Year planning
- Vacation → View yearly planning.
- You see the whole year. Days when several people are on leave at once are highlighted.
- That way you spot bottlenecks early.
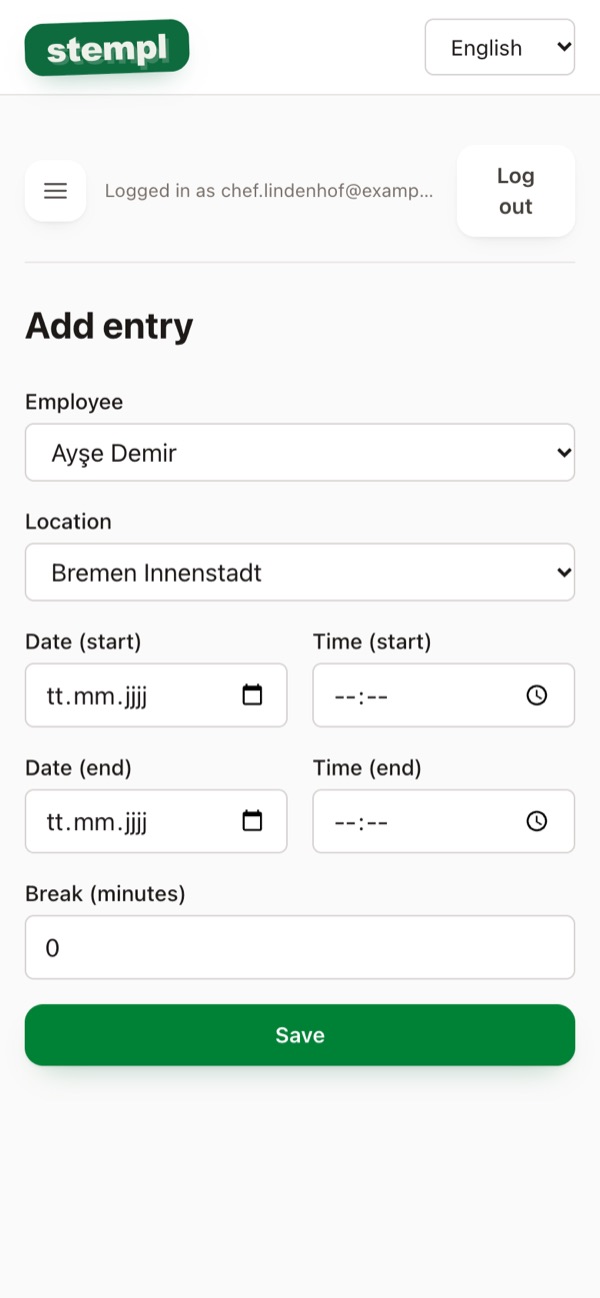
Add or cancel times
- Time tracking → Add entry: enter a time by hand.
- Open a wrong time and correct it with a reason. Or tap Cancel.
- Nothing is deleted. Everything stays in the history, for customs and your tax advisor.
Sick days, special leave and more
- Vacation → Add entry: Sick, Special leave, Use overtime or Unpaid leave.
- Approved leave can also be changed or cancelled later.
- The days are counted correctly in the leave and overtime accounts.

When someone leaves
- Employees → open employee → at the bottom Deactivate.
- The login is locked immediately. Their times are kept for the retention period.
- They no longer count towards your plan.